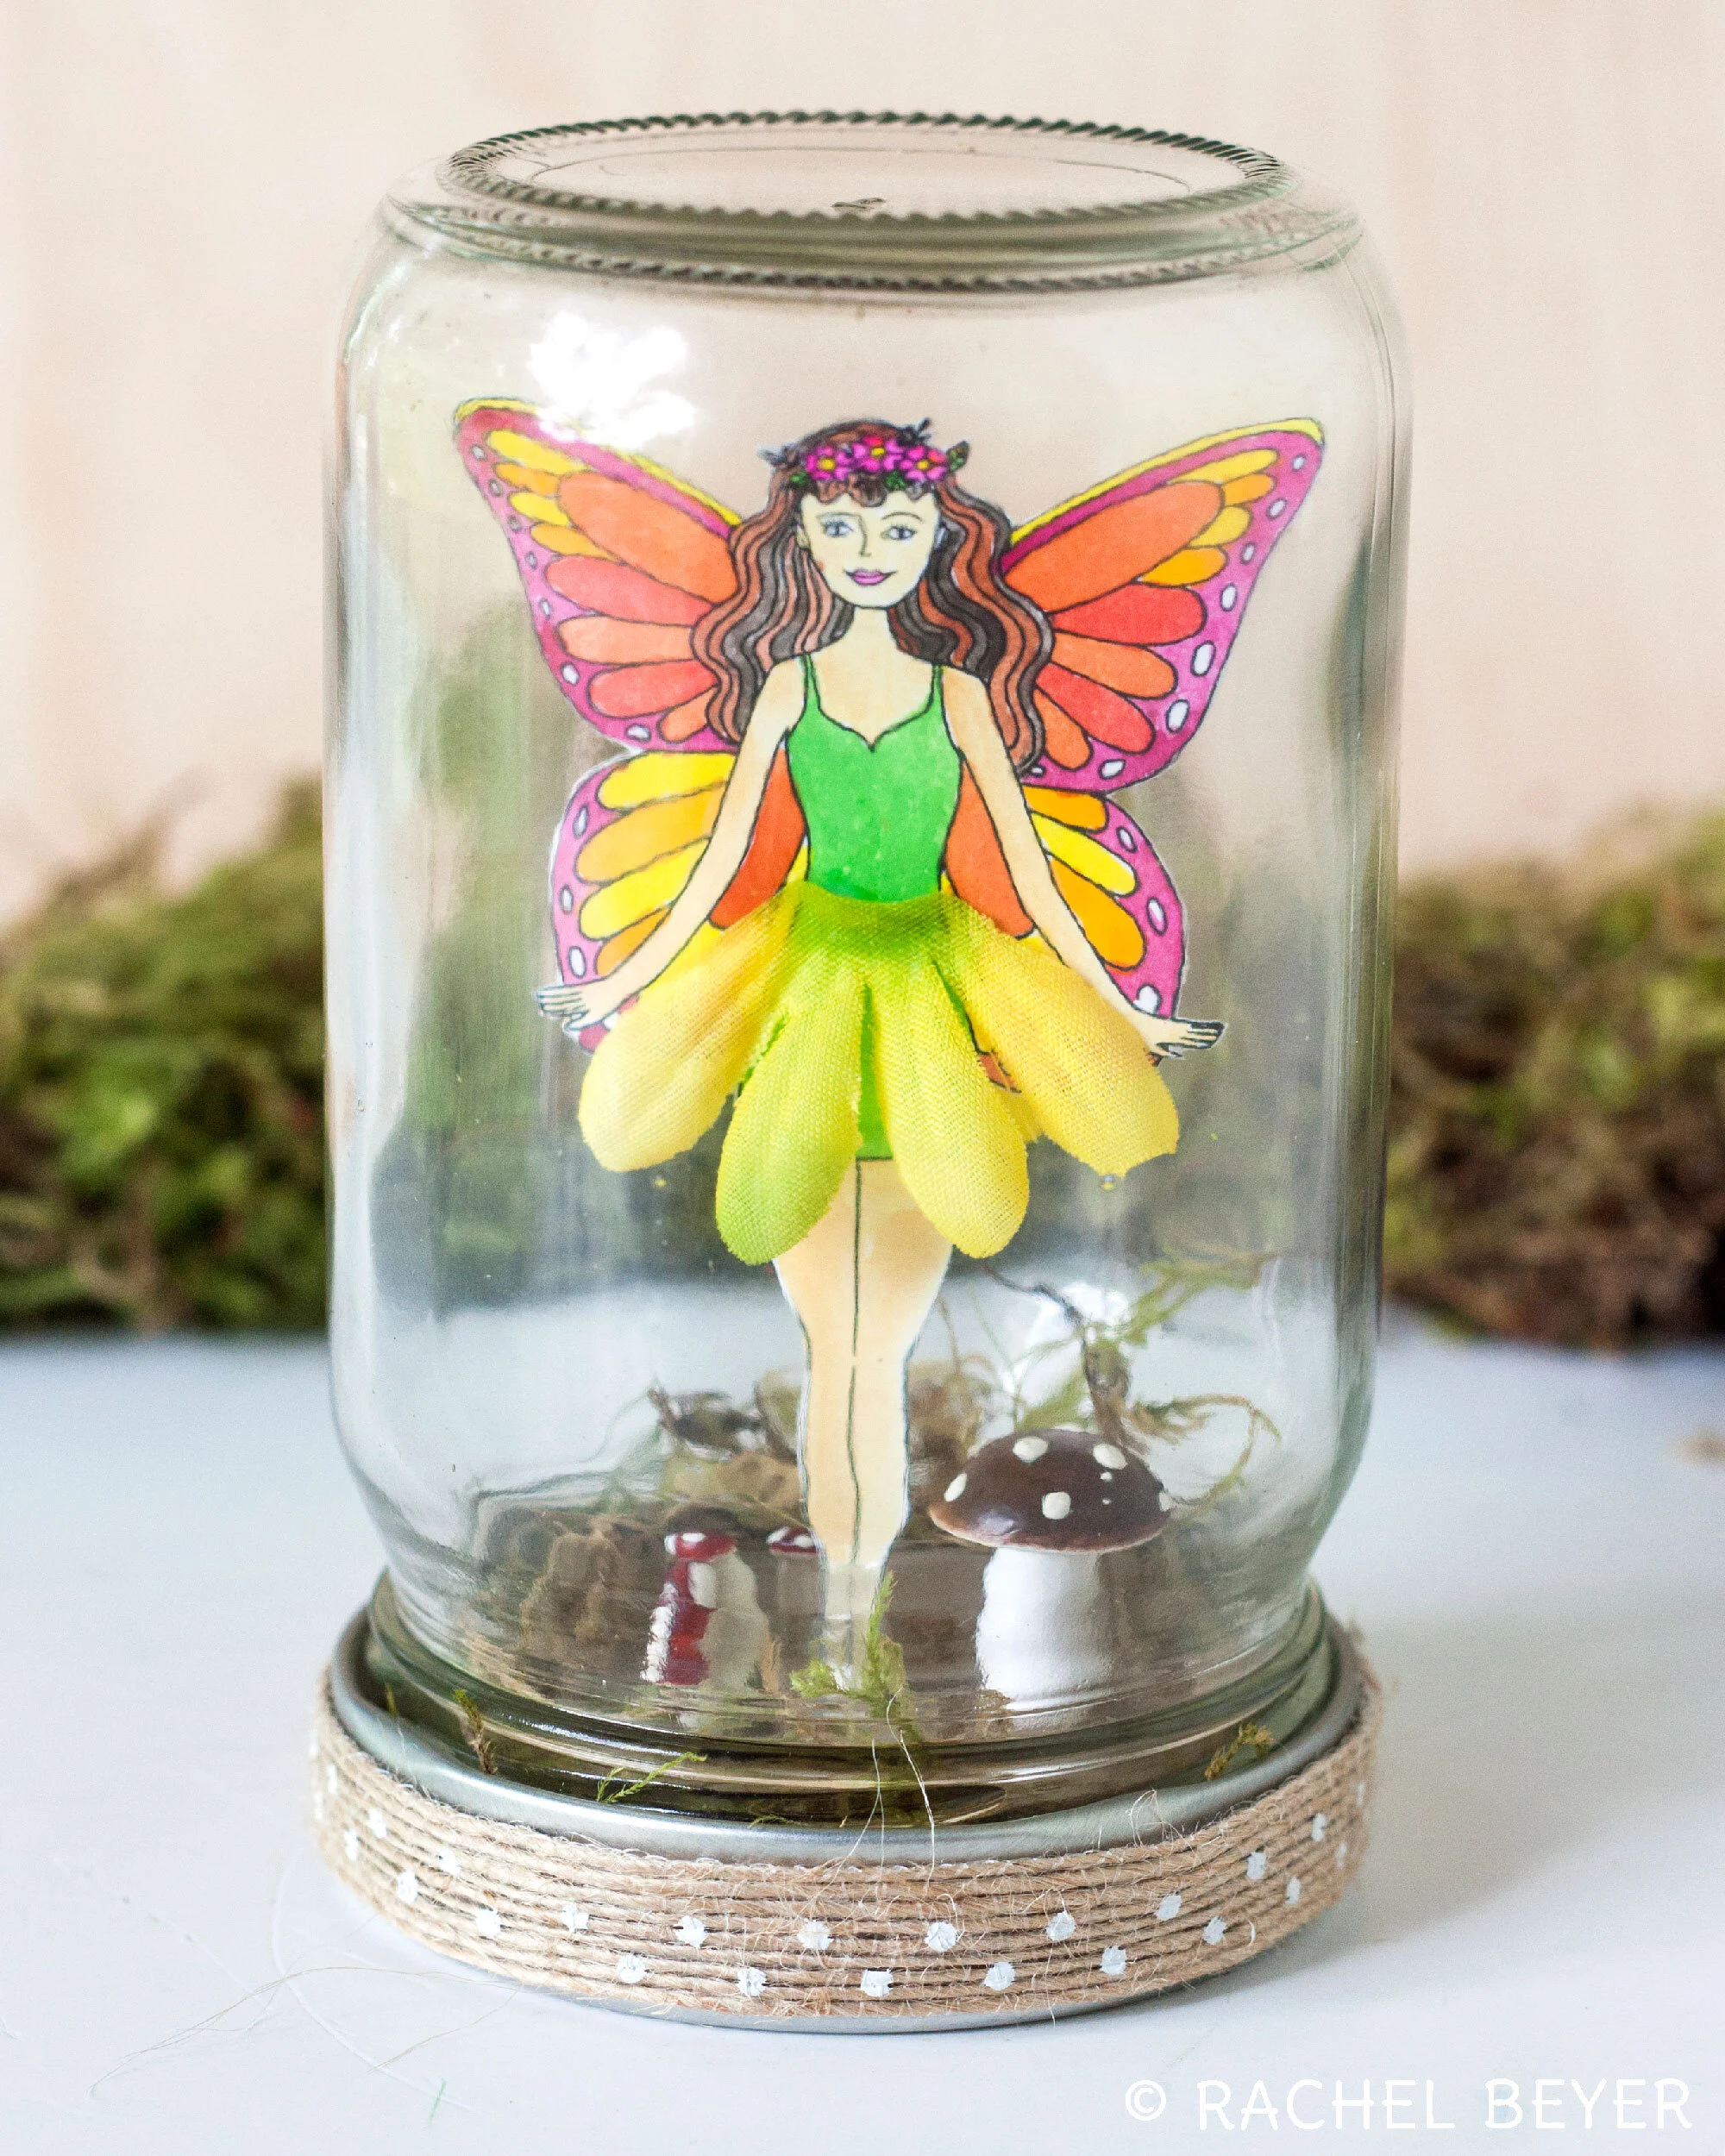
Fairy In A Jar
I have been fascinated by the whimsical mystery of fairies since I was a little girl. I remember looking for them while playing outside and making up tiny little fairy houses using sticks, leaves and flowers I would collect in my backyard. This project is a fun activity to do with your kids (or your inner kid). Download the free printable fairy art and let them color their fairy. Then help them create a little terrarium in a jar for the fairy to be displayed in!

Supplies Needed
• White card stock
• Coloring supplies (watercolors, markers, colored pencils, etc.)
• Glass jar
• Small wood slice (small enough to fit inside the lid of the jar)
• Faux flowers
• Tiny mushrooms
• Moss
Additional tools:
• Scissors
• Glue stick
• Kraft glue
• Hot glue gun

Step One
Instructions
Step One
Download the free printable fairy art and print onto white card stock. You'll notice that there are two different sizes. Choose one to fit your jar (you can also shrink the art down smaller if necessary). Color in two fairies (front and back) with your favorite coloring supplies.
Step Two
Once you've finished coloring, carefully cut out both fairies with scissors and use a glue stick to glue them back-to-back. Choose a faux flower and cut off a few petals into the shape of a skirt. Glue a petal skirt onto the fairy using kraft glue (both front and back sides).
Step Three
Next plug in your hot glue gun. Once warm, squeeze some hot glue onto the center of the wood slice and place the fairy's feet into the hot glue. Hold in place until the glue is dry and she can stand up on her own. Add a few tiny mushrooms around her feet.

Step Two

Step Three
Step Four
Place the mounted fairy into the lid of the jar. Add some moss around the edges then place the jar over the fairy and tighten the lid. Optional: hot glue some ribbon around the base of the lid.
Step Five
If you want her to be secure inside the jar you can hot glue the wood slice base to the inside of the lid. I personally liked being able to take her out and let her explore my garden before returning back to the jar for display.
Step Four

Step Five